


Over the last couple of months, while people have stayed at home during the global pandemic, the question of what to do with our hair has been asked by many. From full-on buzz cuts to painstaking trims, a number of us have taken matters into our own hands.
Last month, model Bella Hadid joined in when she shared her attempt on Instagram of one of the riskiest DIY haircuts: bangs.
Of all the hairstyles, few are as instantly transformational as snipping bangs (called a “fringe” in the UK and other parts of the world), which can instantly frame your face in a whole new way.


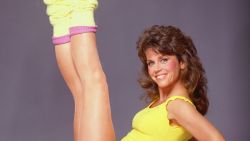
The most iconic bangs in the 20th century
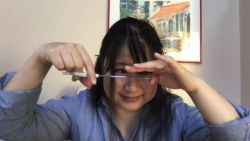
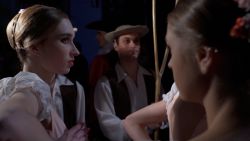
I’d been thinking about getting bangs for some time, but it was only this week that I decided to take the plunge. Celebrity hair stylist Garren (he doesn’t go by a last name) agreed to help guide me via video call.
Garren is the co-founder of his own haircare line R+Co, and responsible for some of the world’s most influential hair. In the 70s, he famously straightened Farrah Fawcett’s iconic feathered hair for a Vogue editorial, and he’s also worked with Madonna and supermodel Linda Evangelista. When Victoria Beckham transitioned from a pop star into a serious designer, she called Garren to help her craft a look that was different to her Spice Girls days.
Suffice to say, I was in safe hands.
“(Bangs) are not for everyone,” he warned me before we began the tutorial. “You need a lot of confidence and you should be guided by someone because you really need to know the shape of your face and what your face can handle.”


Everything you need to know about bangs with Garren, Farrah Fawcett's hair stylist
This would be a first for both of us. Garren had never instructed a non-hairdresser over the internet, and I’d never cut my own bangs from scratch.
Ahead of the call, Garren told me I would need sharp scissors, preferably ones meant for cutting hair, a fine mist spray bottle, some hair clips and a comb that had both wide and narrow tooth patterns. And to finish, a hairdryer and a round brush.
To start, I parted my freshly washed hair down the center and tucked it behind my ear. Garren then guided me to grab a triangular portion on the top and clip the rest back.
“Be sure not to go too far into your temples because if your hairline is really close to your face, you want to make sure you don’t cut it or it’ll stick out,” he said.
To prep for the first cut, Garren asked me to wet the entire bangs area from the scalp downwards and comb it forward.
We would be working in sections, dividing the bangs into three thin horizontal parts, a bit like a layered cake. I took a half-inch section of hair across my forehead and clipped the rest back. A wave of panic hit me – what if my hand slipped and I cut my hair too short?
“We always go longer first,” Garren assured me. “We can always take it up but we can’t put it back on.”
One of the most helpful tips Garren gave me was to rest my finger on the bridge of my nose – the “safe zone” – to guard myself from pointy scissors and to stabilize my hand before cutting my hair.
I took some of the hair between my middle and index fingers, and kept the tension slightly relaxed. If you pull the hair too tight, it can end up too short. Then, using the bridge of my nose as my guide for length, I took the plunge. The first snip was satisfying but seeing it through still felt intimidating.

I took a piece of what I had already cut as a guide and matched it up on both sides – there was a slight unevenness but Garren coached me back.
I repeated the process for the second section of hair. Then, I was finally ready to chop the last segment of my bangs.
“Cut (the last layer) just a little bit longer than the hair underneath it because it’s going to bounce up,” Garren instructed.
He quickly assessed my handiwork and decided we needed to open my face up a bit more. I took more hair from the sides, angled it slightly and cut the corners off so my bangs were wider across my face.
After a quick blow dry, I was ready for the big reveal. I was astounded at how the heavy-set bangs redefined my face and brought out my eyes.
My DIY bangs was one of the scariest things I’ve ever attempted but Garren was an excellent and patient coach. He said that the re-growth period depended on the individual, but suggested a trim in about three to four weeks time. This initial cut took about 45 minutes but maintenance could probably be done in about half an hour, leaving extra time for the sides of the bangs which I found the trickiest.
“You did a good job for the first time,” Garren said. “You did me proud.”
To get Garren’s expert advice on how to cut your bangs at home watch the video above.